Adding an event/date to your corporate calendar
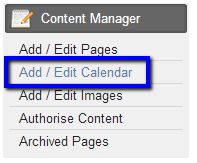
1. Click on the Content Manager link on the grey, left side bar.
2. Then select the Add / Edit Calendar.

3. The screen below will appear, select the Add New Entry button.

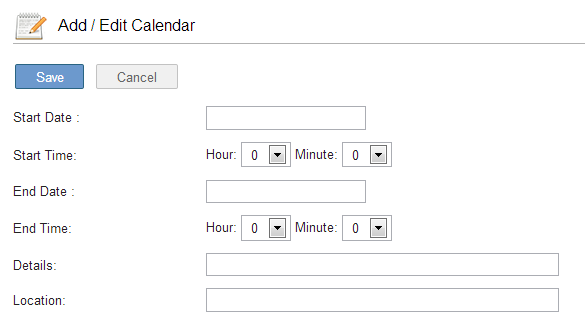
4. The below Add/Edit Calendar screen will appear, from this screen you can add all the details of your event including Date, Time, Details and Location.

Once you have added the details for your Calendar entry click Save.

 Important Note
Before selecting Save on your new calendar entry, please review to ensure that the event details are correct. Once you selected the Save button, your new calendar entry will appear on your website.

Selecting the Cancel button at any stage will take you back to the Add/Edit Calendar main page and any changes made, will not be saved.
Once you have selected Save, you will now be taken back to the main Add/Edit Calendar page where you will see your entry within the HQi calendar.

Your calendar entry will also appear on your website as per the below:


 Email Alerts


